

LEGO minifigure diy shelf storage
if you have wee ones in your house who love LEGO, and you're looking for an easy & good-looking way to organize and display the many minifigures that occupy your space, this is the project for you!
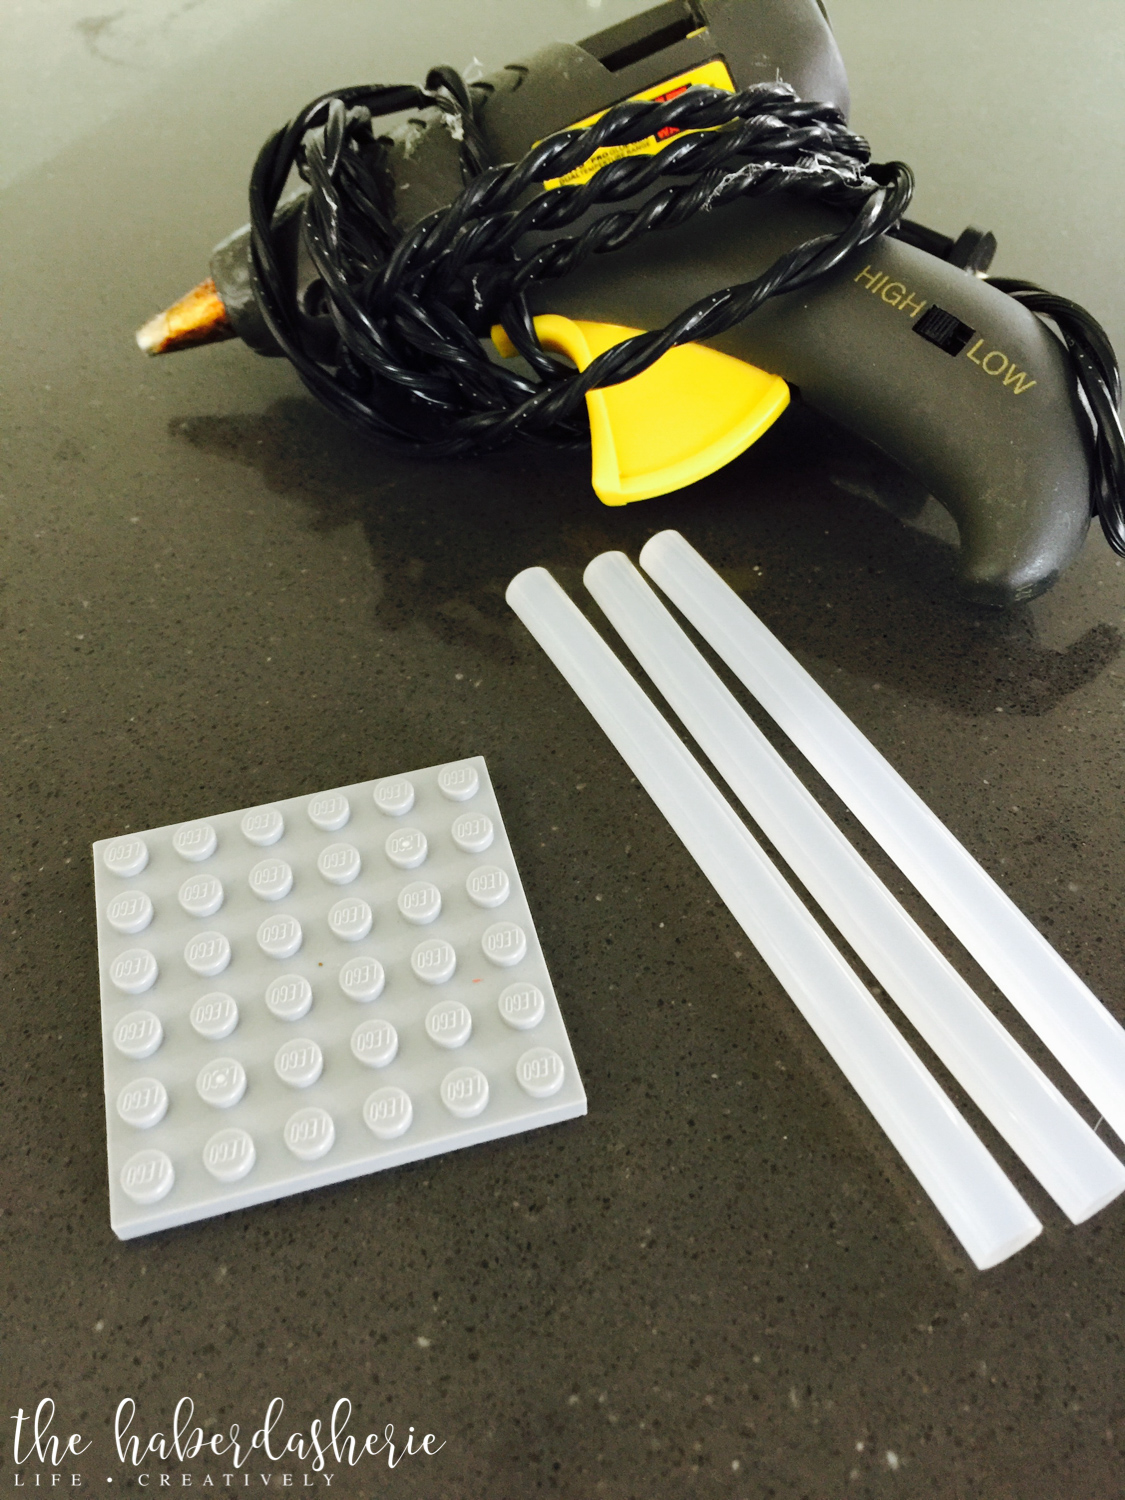
to gather:
a display shelf of choice
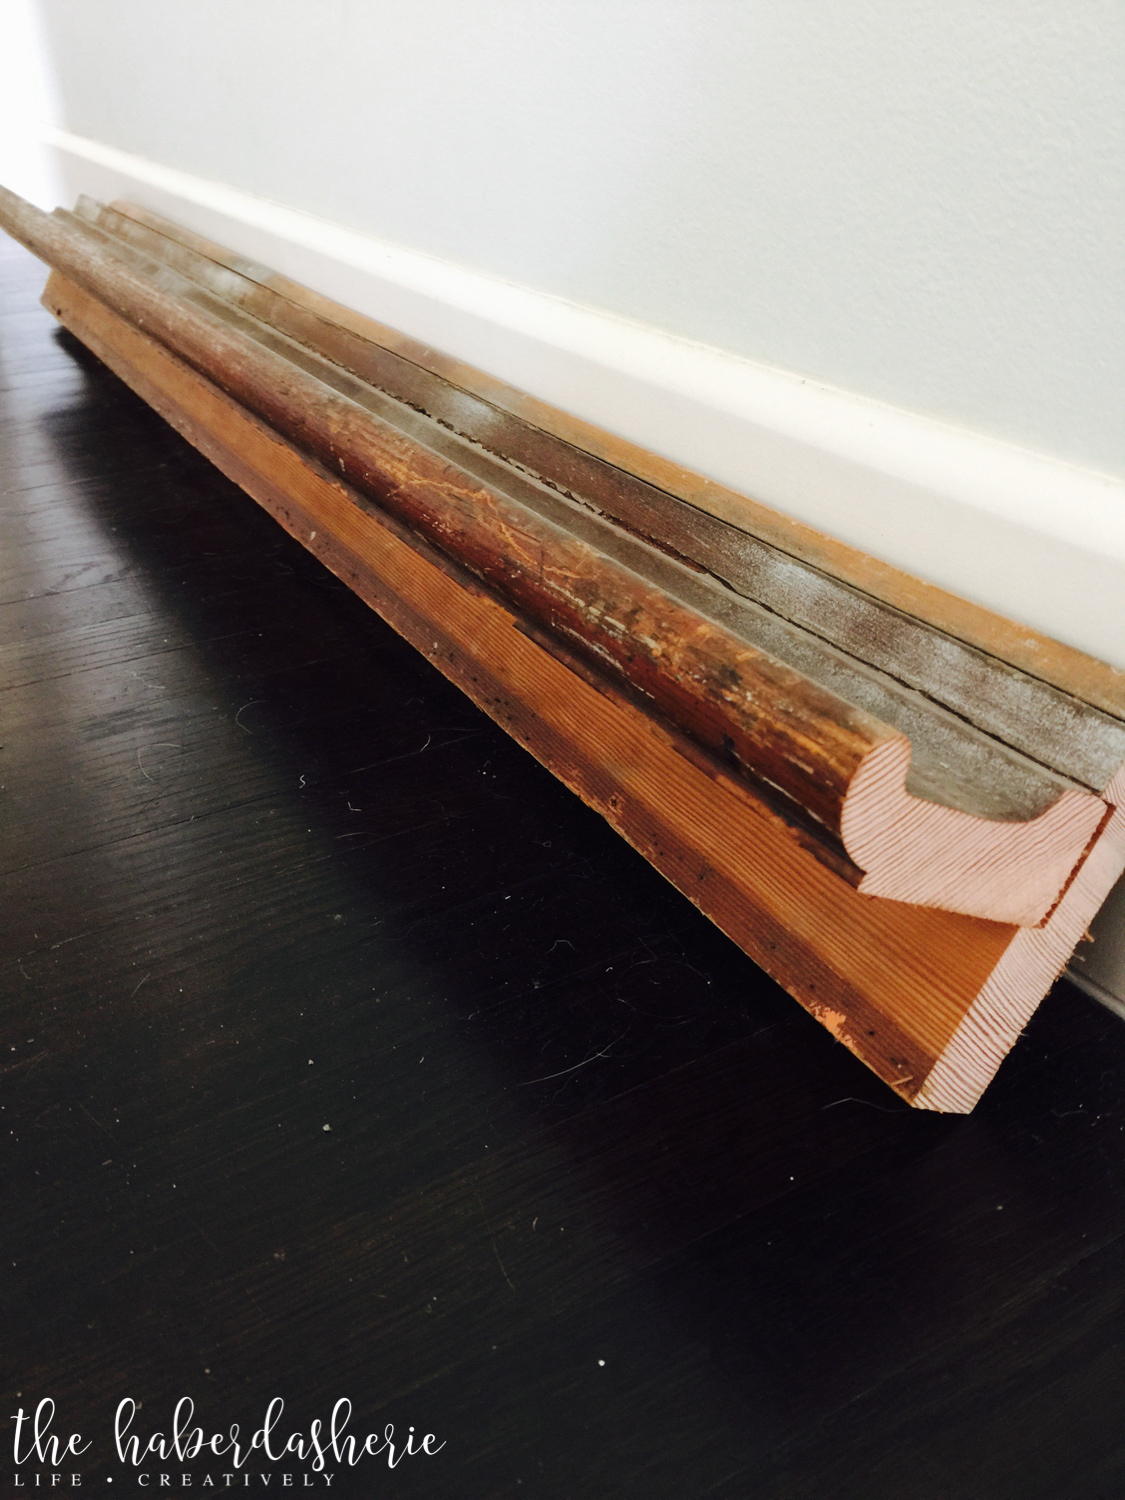
{i am always on the lookout for unique, one-of-a-kind items for our home... a few years ago, i happened upon yards and yards of old schoolhouse chalkboard rails at an architectural salvage in seattle.
i didn't know what i would do with them at the time --- perhaps paint them and use them to display children's books --- but now have found them to be the perfect size for displaying minifigures}
{target sells sets of shelving which work perfectly for this project!}lego baseplates
{in this case, a series of 6x6 plates were the exact width to fit in the channel of my chalkboard rail --- after measuring the length/width of your piece, base plates in varying colors and sizes are readily available and pretty inexpensive on ebay}hot glue gun & glue sticks
sidenote:
in my case, i had a raw piece of wood that i began the project with...
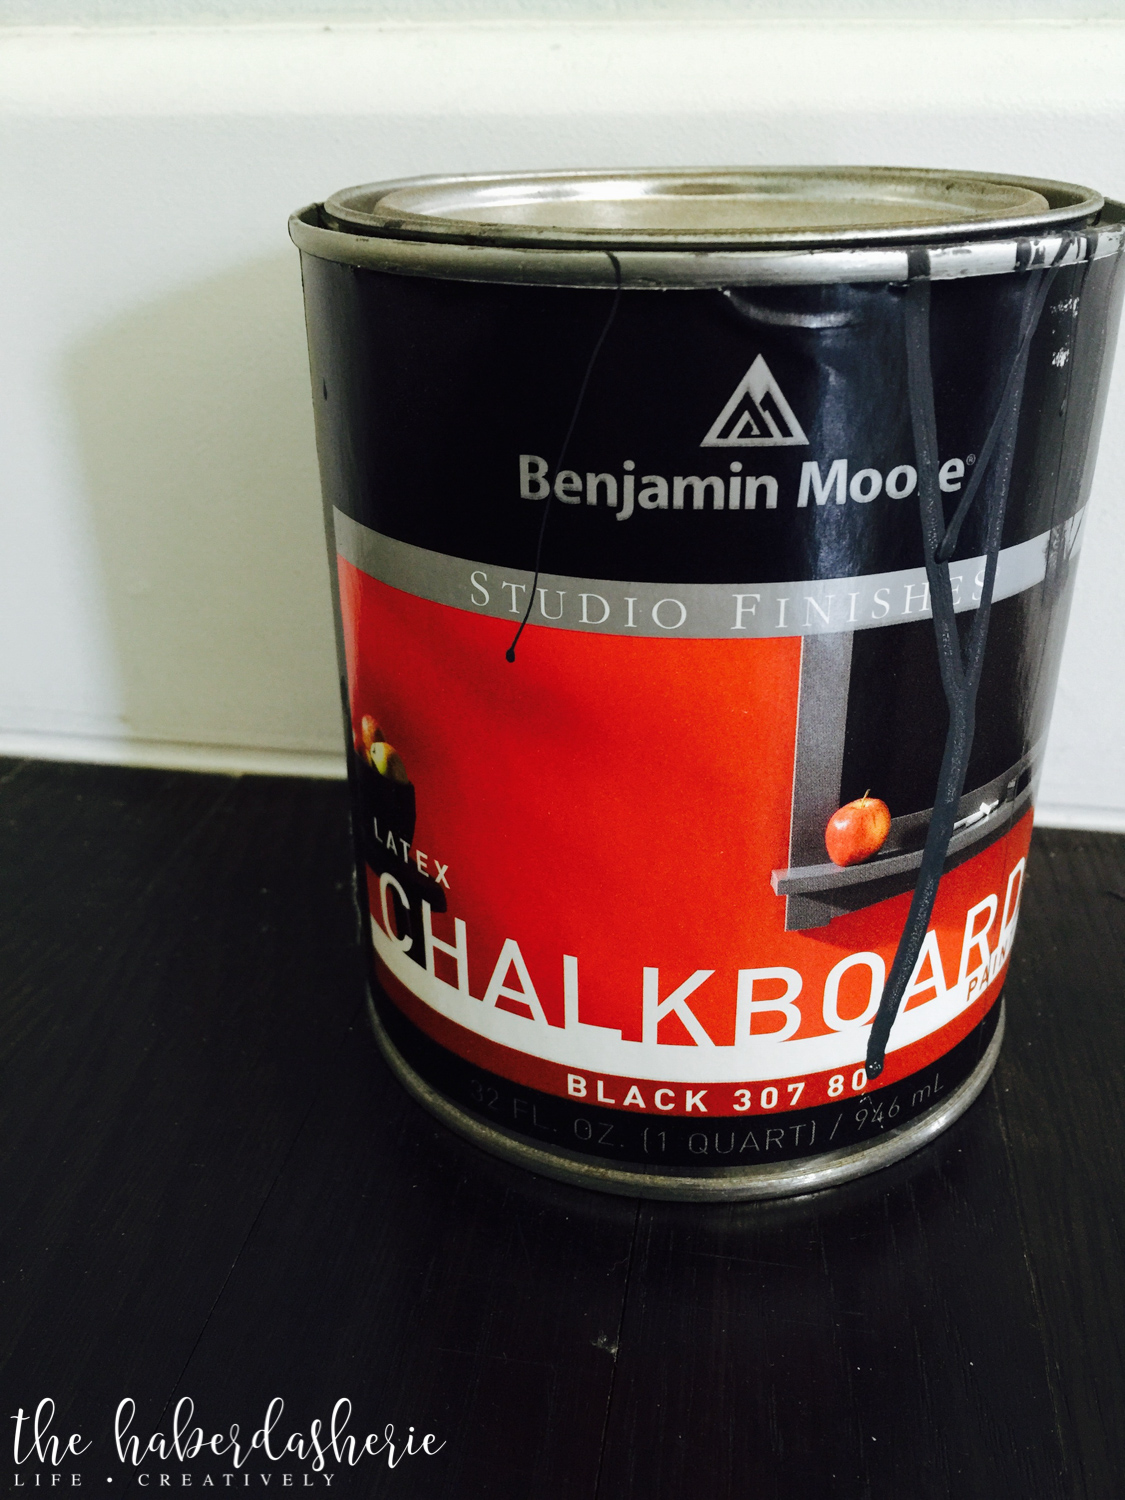
i decided to paint it before applying the base plates...
i began by painting the raw chalkboard rail with a chalky-finish paint, but didn't like the way it turned out...
so, second time around, i went with benjamin moore latex, black chalkboard paint.
i applied two coats, using a sponge brush.
benjamin moore paints are thicker than other paints, and give a nice coating to whatever piece you may be updating.
while i do not intend to write on the piece with chalk, i absolutely love the end result!

to do:
- warm up your glue gun
{once ready to go, you will need to work somewhat quickly...} - beginning at one end of your ledge, apply hot glue.
only apply the amount needed to cover the size of the individual plate you are using... - continue laying lego plates in consecutive order
{be sure to align the edges immediately, so the glue doesn't dry leaving gaps between plates}
{the hot glue will dry quick!}
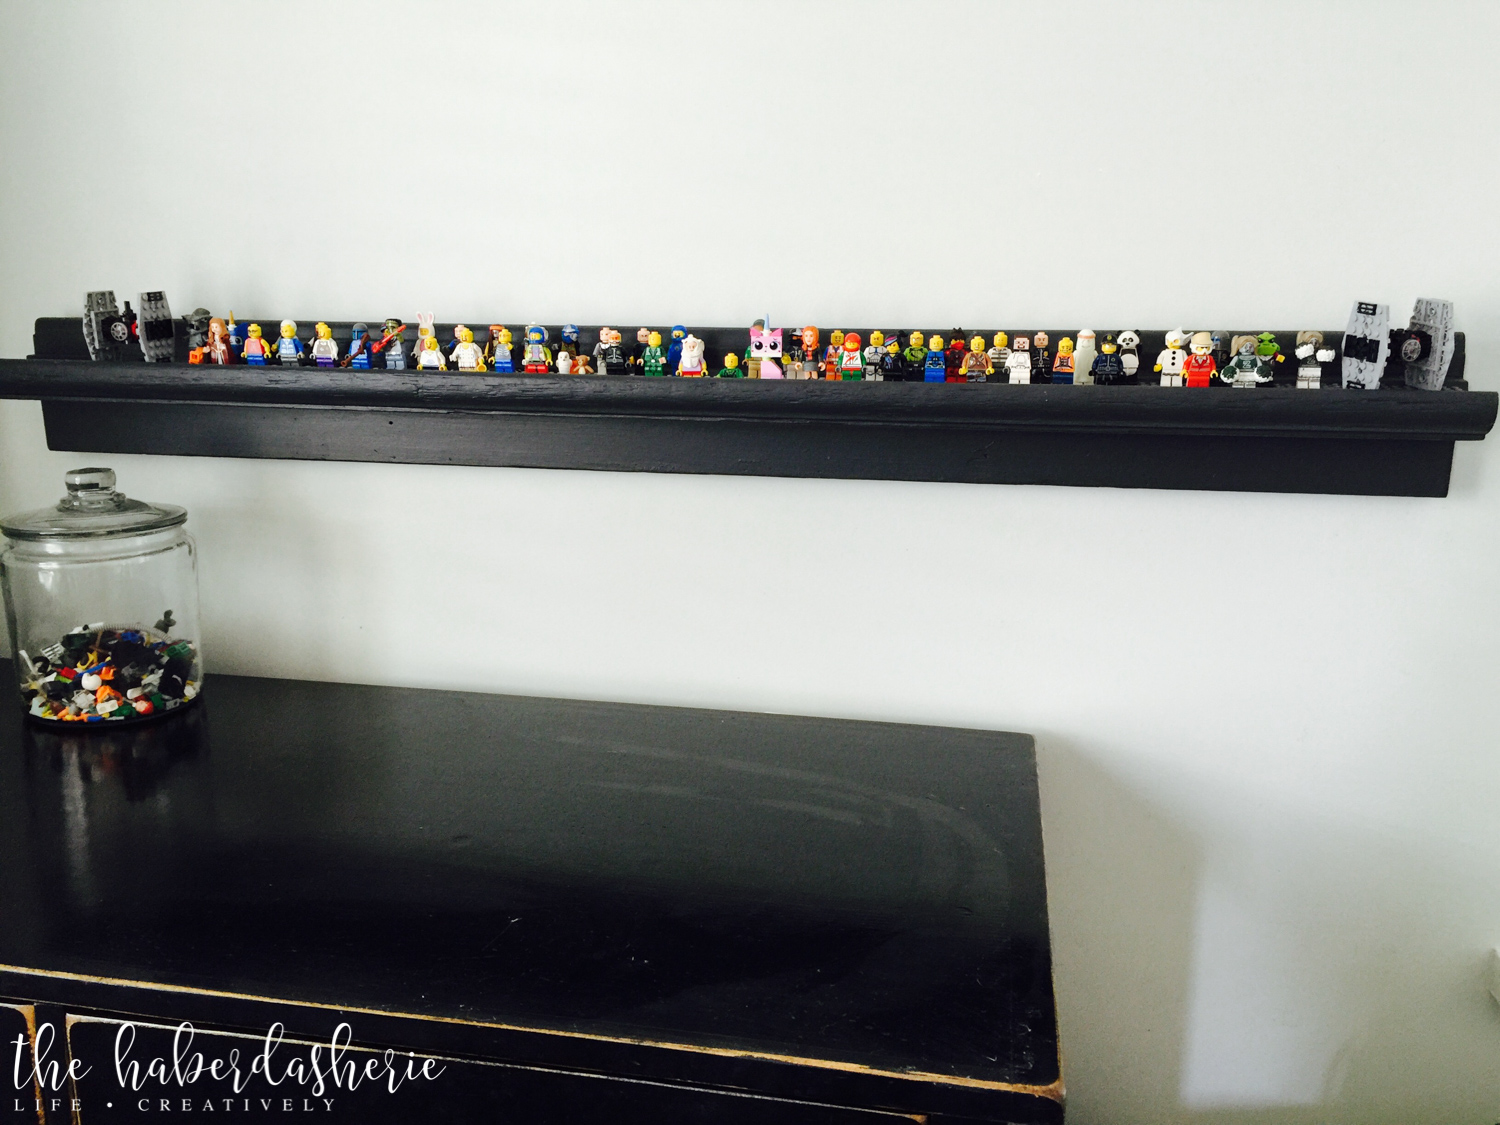
voila!
{this project is quick and easy --- if using a pre-painted ledge/shelf, this project takes about thirty minutes from start to finish!}
