
making strips: a simple rotary cutting tutorial
i've just finished my latest quilt project, a castle treasury pattern from lizzy house, and i am at the point where it's time to add the binding...
the binding is a double layer of fabric used to bind together the edge of all three layers which make up a quilt.
in this tutorial, i will show you how to cut strips for your quilt binding.
{note: this tutorial is also helpful when cutting strips for piecing your quilt project}
to collect:
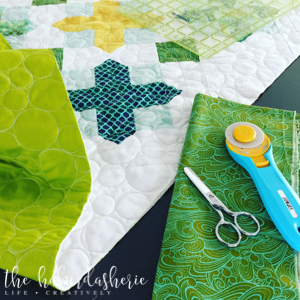
- a rotary cutter {i prefer using a 45mm blade},
- a non-slip quilter's ruler {i prefer a 8.5" x 24" ruler; there are a lot of smaller, rectangular as well as square rulers that are awesome for piecing, but for strip cutting, i use this larger one},
- a self healing mat {i prefer a 18" x 24" mat},
- fabric of choice {here i am using tula pink's making waves fabric, in olive; love love love it!}
in the video above, i show you the few steps to cutting long fabric strips, using your rotary cutter, quilt ruler and self-healing mat.
i hope this helps in your next quilting/fabric project!
{i also like to keep a spare blade and cutting mat for doing paper projects -
it works like a dream!}

xoxo